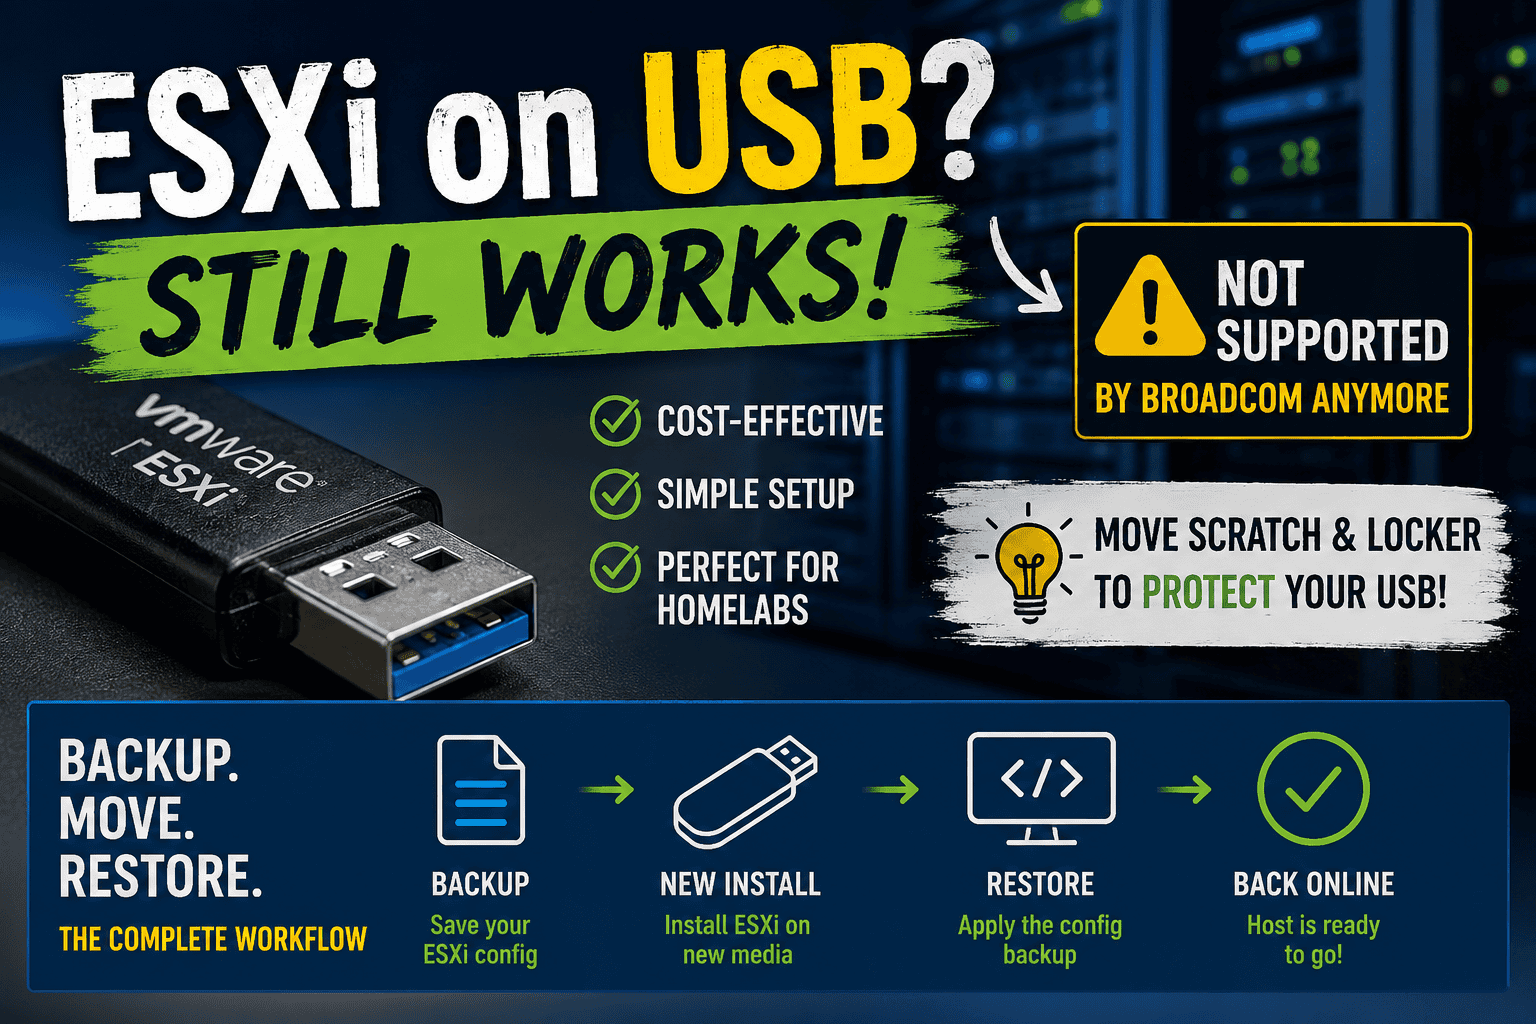
For years, running VMware ESXi from a USB stick or SD card was the standard approach for many enterprise environments and home-labs. Small footprint, low power consumption, cheap hardware – it simply worked.
With newer ESXi releases, however, Broadcom and previously VMware officially moved away from supporting USB sticks and SD cards as boot media. The reason is understandable: modern ESXi versions generate more logs, store more state information locally and heavily wear out flash-based removable media.
Nowadays, many users prefer SATADOMs or small M.2 SSDs over traditional USB sticks, as they provide significantly better reliability and endurance while still being compact, affordable and energy efficient. But still, for many home lab enthusiasts, USB boot devices remain one of the most practical and affordable options when I/O slots are limited.
Why USB Boot Still Makes Sense in a Home Lab
Especially on compact systems like the Intel NUCs or other mini PCs, internal storage is often limited or expensive. Using a small USB stick for ESXi allows you to dedicate the faster NVMe or SATA SSDs entirely to virtual machines and datastores.
Advantages are obvious:
- Extremely low cost
- No additional drive bays required
- Easy replacement
- Minimal power consumption
- Leaves NVMe storage free for workloads
For a non-production environment, this is often perfectly acceptable.
The Real Problem Is Not the Boot Device
In many cases, the USB stick itself is not the main issue. The real problem comes from excessive write activity caused by logs, traces and ESXi state data being written continuously to the boot media.
This leads to:
- vFAT corruption warnings
- bootbank failures
- I/O errors during updates
- failed Lifecycle Manager remediations
- dead USB sticks after months or years
A common error looks like this:
VFAT_CORRUPTION ERROR: A problem with one or more vFAT bootbank partitions was detectedOne important detail many people forget is that VMware ESXi itself runs almost completely from memory after boot. Once ESXi has successfully started, the operating system is largely loaded into RAM, which means the boot device is only used occasionally afterward for configuration changes, updates, logs and persistent system data. This is one of the reasons why USB sticks, SD cards, SATADOMs and small M.2 devices worked surprisingly well for many years. The real wear problem is usually not the runtime of ESXi itself, but the continuous write activity caused by scratch, locker, logs and state information being stored on the boot media.
Move the Scratch and Locker Partition
One of the best improvements for USB-based ESXi installations is moving the scratch and locker location away from the USB device.
This significantly reduces write operations and increases the lifetime of the boot media.
VMware itself has recommended this approach for years.
Check Current Scratch Location
esxcli system settings advanced list -o /ScratchConfig/ConfiguredScratchLocationCreate a Scratch Directory on a Datastore
Example:
mkdir /vmfs/volumes/datastore1/scratchConfigure the New Scratch Location
esxcli system settings advanced set -o /ScratchConfig/ConfiguredScratchLocation -s "/vmfs/volumes/datastore1/scratch"Or via the ESXi Host Client:
- Host
- Manage
- System
- Advanced Settings
ScratchConfig.ConfiguredScratchLocation
After a reboot, logs and temporary files will no longer constantly wear out the USB stick.
Moving the Locker Partition
The locker partition stores:
- VMware Tools packages
- core dumps
- persistent system files
It can also be redirected to persistent storage.
Example:
mkdir /vmfs/volumes/datastore1/lockerConfigure the new locker location:
esxcli system settings advanced set -o /UserVars/ProductLockerLocation -s "/vmfs/volumes/datastore1/locker"Then reboot the host.
Backup Your ESXi Configuration Regularly
If you are running ESXi from USB media, configuration backups are essential. USB devices can fail unexpectedly and often without much warning.
Fortunately, backing up the ESXi configuration is simple.
Create a Backup
Enable SSH on the host and run:
vim-cmd hostsvc/firmware/sync_config
vim-cmd hostsvc/firmware/backup_config
The command returns a download URL similar to:
http://<ESXI-IP>/downloads/configBundle-esxi-host.tgzDownload and safely store this file.
The backup contains:
- network configuration
- vSwitches
- VMkernel adapters
- storage settings
- licenses
- firewall rules
- advanced settings
Restoring the Configuration to a Fresh Installation
When a USB stick fails, replacing it is usually faster and safer than attempting repairs.
Recommended Workflow
- Install ESXi fresh on a new USB stick, SSD, or NVMe device.
- Configure only:
- management IP
- hostname
- root password
- Enable SSH.
- Upload the previously saved config bundle to
/tmp.
Example using SCP:
scp configBundle-esxi-host.tgz root@<ESXI-IP>:/tmp/Restore the Backup
Enter maintenance mode:
vim-cmd hostsvc/maintenance_mode_enterRestore the configuration:
vim-cmd hostsvc/firmware/restore_config /tmp/configBundle-esxi-host.tgzThe ESXi host will reboot automatically.
After reboot, the host should come back with:
- original networking
- datastore mounts
- vSwitches
- cluster configuration
- licenses
- most host settings restored
Important Notes
The restore works best when:
- using the same ESXi major version
- using similar hardware
- keeping the same boot mode (UEFI vs Legacy BIOS)
If you are using a VMware vCenter Server Distributed Switch, always ensure your uplinks and management networking are documented before restoring.
My Recommendation
For production:
- Use SSDs, SATADOMs, or enterprise-grade boot devices.
For home labs:
- USB boot still works perfectly fine if configured properly.
- Move scratch and locker to persistent storage.
- Keep configuration backups regularly.
- Use high-quality USB media instead of cheap generic devices.
A good USB 3.0 stick combined with relocated scratch storage can easily survive for years in a home lab.
And honestly: not every home lab needs enterprise-grade hardware just to run a few virtual machines.
Final Thoughts
While Broadcom no longer supports USB and SD card boot devices for modern ESXi deployments, they still remain a practical and budget-friendly solution for many enthusiasts.
The key is understanding the limitations and reducing unnecessary write wear.
With proper scratch relocation, locker configuration and regular config backups, USB booted ESXi hosts can still be reliable enough for many home lab scenarios.


Schreibe einen Kommentar